As much as I've loved using Blogger (and it has been a good year and a half), I've decided that this blog needs a both a face lift and a new host. I look forward to seeing you all there!
New address:
http://cupcakepunk.wordpress.com
Tuesday, September 23, 2008
Friday, August 29, 2008
Dead Computer
So. My computer's dead. I'm typing this from my work laptop, but I can't import any pictures, so the blog's on hiatus until I can figure out a better situation.
When it rains, it pours.
But then it's time to bake!
::edit:: Still waiting for insurance to figure things out with the computer. BUT, on the bright side, when things do get worked out, I have tons of pictures and recipes to post. Give me another week, two at the latest!
::edit edit:: September, 20: Looks like it's just going to be one more week until I have a working computer! By October and VeganMoFo, I should be up and running. I'm also working on switching over to WordPress, so I'll let you know when that's done. Thanks for waiting!
Sunday, August 24, 2008
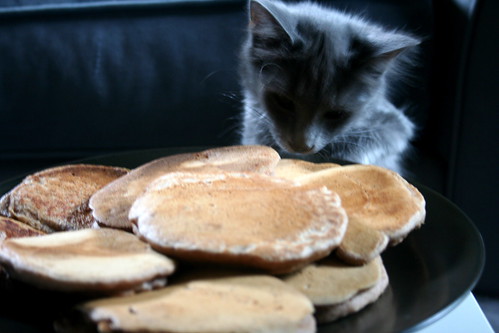
I Can Flip, Yes I Can
We all have our cooking hang-ups. You know, those techniques we can't master, those ingredients that we just can't figure out how to cook right (eggplant--do I leave the skin on or off? Seriously.), that vocabulary that all runs together (it's not like we went to cooking school; why aren't definitions attached to every French word??). These hang-ups dictate what we cook or don't cook, what we're willing to bake and what we shy away from. I'm not saying we don't try and try and try again to figure out how to master whatever the bane of the kitchen is, but it's frustrating and, personally, I feel like I fail every time.
Now, brunch/breakfast is my favorite meal. It's also the poet's. So I feel like I need to come up with something tasty and innovative every now and then. And who doesn't love a good pancake?! They're carby and filling and can be made with lots of different twists. So here's where the hang-up comes in: I can't flip a pancake if my life depends on it. Remember that crepe cake? (I can't post a link, it was deleted with my first blog.) I think I had 20something crepes in it. You know how long that took me?? FIVE hours. FIVE HOURS for TWENTYsomething crepes. And that was all because I couldn't flip them. Fail.
 Kitten Approved
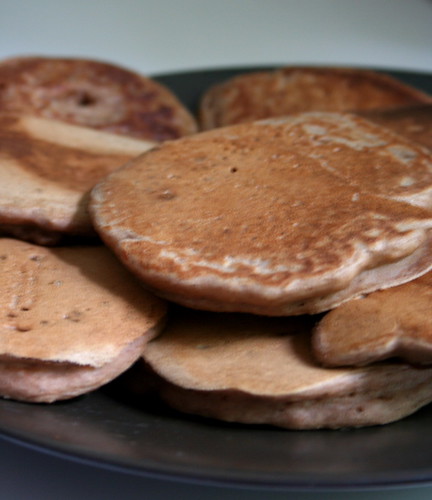
Well, I'd like to announce that thanks to the twenty-step pancake flipping anxiety program, I think I've mastered my hang-up. I can now flip with confidence! No, really, I just figured out how to flip pancakes. I've been trying for...oh...ten years or so now. Practice makes perfect, I guess. Look at that stack!
So, whatever your food hang-up is, don't give up. Keep flipping. Or grilling. Or sauteeing. Or using that damned eggplant.
 VwaV Banana Pancakes
Changes I made:
1 tsp cinnamon
1/2 tsp cardamom
1/8 tsp cloves
1/2 cup chopped walnuts
Now, brunch/breakfast is my favorite meal. It's also the poet's. So I feel like I need to come up with something tasty and innovative every now and then. And who doesn't love a good pancake?! They're carby and filling and can be made with lots of different twists. So here's where the hang-up comes in: I can't flip a pancake if my life depends on it. Remember that crepe cake? (I can't post a link, it was deleted with my first blog.) I think I had 20something crepes in it. You know how long that took me?? FIVE hours. FIVE HOURS for TWENTYsomething crepes. And that was all because I couldn't flip them. Fail.
 Kitten Approved
So, whatever your food hang-up is, don't give up. Keep flipping. Or grilling. Or sauteeing. Or using that damned eggplant.
 VwaV Banana Pancakes
1 tsp cinnamon
1/2 tsp cardamom
1/8 tsp cloves
1/2 cup chopped walnuts
Wednesday, August 20, 2008
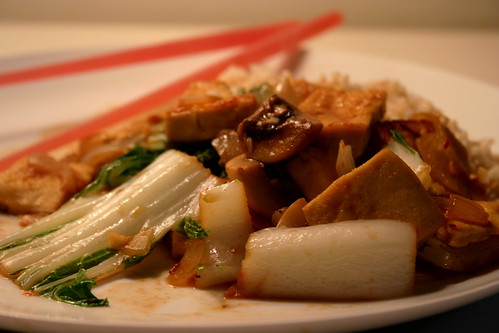
Chinese Orange Tofu & Vegetables
You can probably tell by now (if you check my blog on any kind of semi-regular basis) that I love to stir fry. All of the world's evils can be corrected with a wok, tofu, vegetables, and some rip-off Chinese sauce. I'm normally pretty boring and make the garlic sauce 5 out of 6 times (it's just that good! and easy!), but I decided to splurge and cook the poet something different for a celebratory "you just got through your first day back to teaching" meal.
Since I'd been grocery shopping at the Dekalb Farmer's Market fairly recently, I had a lovely head of organic bok choi on hand, as well as several blocks of tofu, and mushrooms. I thought about the sauces I love at Green Sprout (can anyone say garlic broccoli?!?! It's so addicting) and remembered a tangy orange sauce they serve on certain dishes. The sauce I made isn't exactly like the one at Green Sprout, but it's pretty heavenly. I'm heavy on the spices, so if you don't like spicy food, I'd definitely cut the crushed red pepper down to 1 tsp or less.
 Chinese Orange Tofu & Vegetables
For the sauce:
2/3 cup orange juice
4 tablespoons dark soy sauce
2 tbsp agave nectar
1 1/2 tsp crushed red chili peppers
3 cloves garlic, minced
2 tsp powdered ginger
For the stir-fry:
1 16 oz block of extra-firm organic tofu, cut into thin 1x1 inch pieces
1 medium onion, diced
1 head of organic bok choi, chopped into 1 inch pieces
8 oz button mushrooms, halved and quartered (depending on size)
vegetable oil for cooking
Combine all of the sauce ingredients in a bowl. Set aside.
Dry fry the tofu. I divide to tofu into 2 batches to do this. Once cooked to the way you like it, set aside on a plate to add to the stir-fry later.
In a wok, heat up 1-2 tbsp of vegetable oil on medium heat. Add the onion, cook for 6-7 minutes or until the onion turns clear and soft. Add the mushrooms and previously cooked tofu. After 3-4 minutes, add the bok choi. Cook everything until tender.
Add the sauce to the wok and cook everything for 1-2 minutes.
Serve over rice.
Monday, August 18, 2008
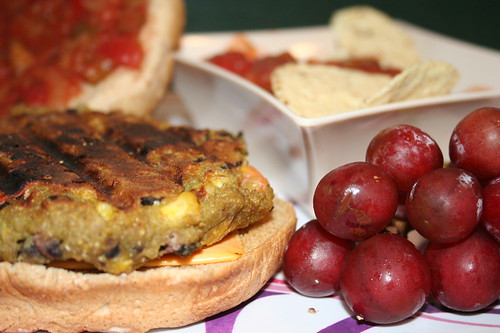
Avocado Burgers, Or Why Jes Needs a George Foreman Grill
 Sheba & Mistoffelees
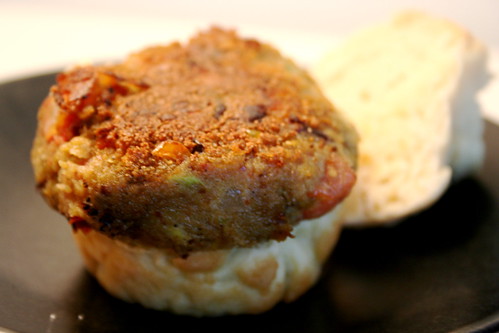
On to the recipe. Well, the recipe below deserves a better photograph. Like, a good slider would have condiments of sorts, a tomato slice, maybe lettuce--something tasty--but I ate it this way, plain with a crack biscuit. The crack biscuit obviously made up for any lack of anything but burger and biscuit, not gonna lie.
 Anarchy Burgers, 2007
I've been toying with this recipe for over a year. Above a picture of the last blog post I made about them on the now erased original Cupcake Punk. (sigh) Last summer I was fortunate enough to have a roommate who owned a George Foreman Grill that she used specifically for veggie burgers and the grill was perfect for my avocado burgers. No matter how juicy and not uberly firm the patty was it would still grill like a nasty Boca Burger. Now I have to fry them, which is insanely less healthy, but still delicious. Maybe more falafelish. I've been thinking about baking them, but haven't gotten to that yet.
For this batch I used chipotles instead of jalepenos. I like the smoky flavor, although the jalepenos* give more a kick to the burgers. You can throw in whatever ingredients you think will shine. The real beauty of these is the ease and the freeze. They take ~10 minutes to make and then you can make individual patties, saranwrap them, throw them in a ziploc bag in the freezer, and then pull one out to cook whenever you're hungry. This is my secret for staying alive in college, actually. One batch makes up to 20 burgers, so that's a steal for the ~ $10 in ingredients or so.
*The Firefox spell check for "jalepenos" results in a first option of "Pentecostals." **giggle**
 Avocado Burgers
4 ripe avocados
2 medium on the vine tomatoes, diced
1 can black beans
1 medium onion, minced
2 cups frozen corn (or fresh corn off of the cob)
4-5 chipotle peppers in adobo sauce, chopped finely
2 cups bread crumbs
olive oil/vegetable oil for sauteing
In a frying pan, sauté the onion on medium heat for 6-7 minutes until clear and tender. Add the corn and chipotles, sauté until the corn slightly browns on the edges. Take off the heat and allow to cool.
Meanwhile, in a large bowl, mix the avocado, black beans, and tomatoes. Mash slightly, but you want to leave most of the black beans and tomato dice whole--just make sure the avocado is mashed to a smooth consistency. You're going for a smooth guacamole texture.
Add the corn mixture to the avocado mixture bowl, combine. Add the bread crumbs (you may need less or more depending on how moist the mixture is) and mix with a spoon. You may want to use your hands to combine everything together.
Form into individual patties and grill/sauté/freeze them. Serve on buns, biscuits, naan with hummus (my favorite!), however you like!
Friday, August 15, 2008
Crack Biscuits
 Miss Dorian Gray on my couch
Now for the best biscuit recipe EVER. I'm going to warn you right now: don't read this post any further unless you're willing to make a commitment. A serious commitment. A commitment to carbs. If you're low-carb, no-carb, anti-everything-that's-good-in-this-world-carb, then stop. (Anyways, I don't know why you'd be reading my blog if you hate carbs...) Just don't say I didn't warn you.
These, these are crack biscuits. I swear there's got to be MSG or crack slipped in them somehow while I'm not looking. Maybe there's some major chemical change while they bake. Maybe, just maybe, the southerners did something right.
The problem is, I can't stop making them. This is my...7th? batch or so in two weeks. Seriously. At first I didn't have self-rising flour, and even though they were super dense and tiny and probably not that good, I kept making them will all-purpose flour until I went to the grocery store to buy flour specifically for these biscuits. I've also used up an entire jar and a half of veganaise on them too.
And why are they so good? Baked in a muffin tin, they get more crispy on more area, leaving a golden satisfying hardness with each bite of the bottom. But on top and in the middle they are so light and so fluffy and so buttery and so satisfying. I'm eating my 3rd one of the morning as I speak. And did I mention they only need three, THREE!, ingredients?
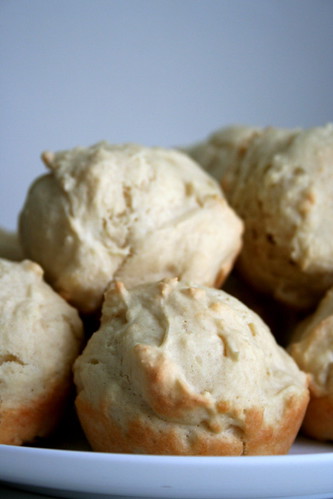 Southern Mayo Biscuits
2 cups self-rising flour
3 tbsp veganaise
1 cup soy milk
Preheat oven to 350 degrees.
Mix all ingredients together in a bowl. Spray a muffin tin with oil. Spoon the biscuit batter into the muffin tin so that each cup is half-full. Bake for 15-20 minutes or until the bottoms of the biscuits are golden-brown.
Thursday, August 14, 2008
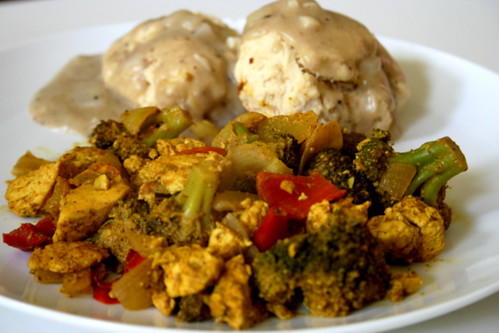 VwaV Scrambled Tofu & Baking Powder Biscuits
No time for a real post. But coming up, the world's best biscuits EVER. Even better the ones above. If you want the recipes and don't own Vegan with a Vengeance...then you should really buy it. Seriously. That and Veganomicon. Oh, and while you're at it, go vote for Terry & Isa in the VegNews Awards.
Happy Thursday, all!
Happy Thursday, all!
Monday, August 11, 2008
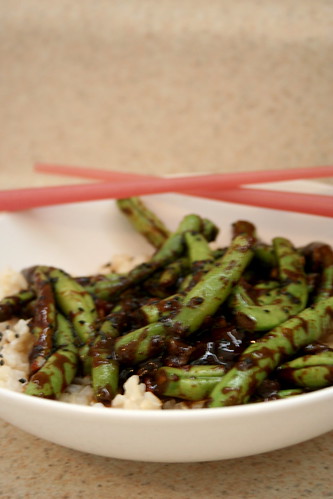
Hoisin Green Beans
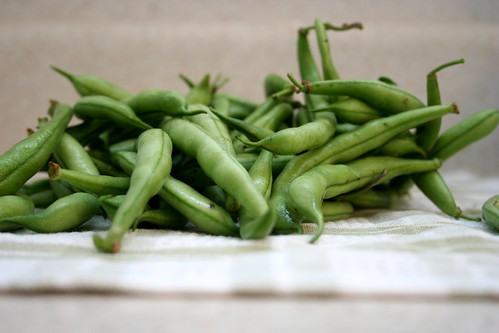
The other week when I was out of money and food with only $4 to my name, I popped into the farmer's market that convenes every Tuesday on Emory's campus to see what I could grab for a few bucks. For $3 I grabbed a bunch of green beans from one of the farms, walked home, and then tried to figure out what I could make with green beans and one onion and the staples in my pantry. A stir-fry made sense, so I boiled some rice, sauteed the onion with garlic, added the beans, and then topped with Hoisin sauce mix. It was pretty tasty, and somehow even better the longer it sat in my fridge.

The sauce was pretty good. A bit too salty for my taste, but maybe that's just how hoisin is? I had a bottle in my pantry that I'd picked up from the market a few months ago and this was the first time I used it.
So if you have a few veggies sitting around in your fridge that you need to use up, I would recommend this recipe. It's simple, tasty, and would work with any summer squash, green beans, tofu, broccoli, etc.
 Hoisin Green Beans
1 bunch of green beans, cleaned and halved
1 onion, minced
3 garlic cloves, minced
vegetable oil
1/3 cup hoisin sauce
2 Tbsp Chinese rice wine
1 Tbsp Oriental sesame oil
1 Tbsp tamari soy sauce
Saute the onion for seven minutes (or until soft) in a large wok with 1-2 tablespoons of vegetable oil. Add the garlic, saute for one or two more minutes. Add the green beans, saute till tender, approx. 10 minutes.
Meanwhile, mix the hoisin sauce, rice wine, seaseme oil, and tamari in a bowl.
When the beans are soft, pour the sauce on top. Saute for one minute.
Serve over rice.
Tuesday, August 5, 2008
Broccoli Pesto
Sorry it's taken so long! My money situation is finally worked out, which means that I can afford groceries to make tasty things with, which means that I could renew my flickr, which means that I can get back in the swing of things, etc!
Since coming back from vacation in New York, I've been completely broke and living off whatever was left in my fridge and pantry--i.e. lots of pasta with tomato sauce and biscuits. Last week I did manage to buy a bunch of green beans and a giant zucchini at the local farmers market for $4, so I got a little green back into my diet. On the whole though, I've been eating terribly. Pasta, biscuits, and coffee. Not good for 50+ hour work weeks on top of class and homework.
 I have to admit, as I was making the blog rounds today, I just realized that my favorite Canadian vegan nominated me for the Brilliante Weblog Premio 2008 award. (smile) In the interest of passing it along, I'd like to give it to Hannah at Bittersweet, Celine at Have Cake Will Travel, Shelly from Musings from the Fishbowl, Lori at Pleasantly Plump Vegan, Leigh at Raspberry Swirl (even though she already has it--double the love!), the vegan world's fave VeggieGirl, and Ashley Nicole at Vegan Invasion. You all inspire me in your cooking and baking!
I'm still working 50 hour weeks, so I'm going to leave you with a super fast and easy broccoli pesto recipe from Heidi over at 101 Cookbooks.
 Broccoli Pesto
1 medium head of broccoli (about 3 cups), cut into very small florets
1/2 cup walnuts, toasted
1 clove of garlic
juice of 1/2 a lemon
1/4 teaspoon + fine grain sea salt
1/3 cup extra-virgin olive oil
To cook the broccoli, salt the boiling water and add the broccoli. Cook for just twelve seconds. Drain immediately and run cold water over the broccoli to stop the cooking. Reserve a few of the small broccoli trees and puree the rest in a food processor along with the walnuts, garlic, lemon juice and salt. Drizzle in the olive oil while still blending. Taste, adjust with more salt or lemon juice if needed.
Serve over pasta!
Since coming back from vacation in New York, I've been completely broke and living off whatever was left in my fridge and pantry--i.e. lots of pasta with tomato sauce and biscuits. Last week I did manage to buy a bunch of green beans and a giant zucchini at the local farmers market for $4, so I got a little green back into my diet. On the whole though, I've been eating terribly. Pasta, biscuits, and coffee. Not good for 50+ hour work weeks on top of class and homework.
I have to admit, as I was making the blog rounds today, I just realized that my favorite Canadian vegan nominated me for the Brilliante Weblog Premio 2008 award. (smile) In the interest of passing it along, I'd like to give it to Hannah at Bittersweet, Celine at Have Cake Will Travel, Shelly from Musings from the Fishbowl, Lori at Pleasantly Plump Vegan, Leigh at Raspberry Swirl (even though she already has it--double the love!), the vegan world's fave VeggieGirl, and Ashley Nicole at Vegan Invasion. You all inspire me in your cooking and baking!I'm still working 50 hour weeks, so I'm going to leave you with a super fast and easy broccoli pesto recipe from Heidi over at 101 Cookbooks.
 Broccoli Pesto
1 medium head of broccoli (about 3 cups), cut into very small florets
1/2 cup walnuts, toasted
1 clove of garlic
juice of 1/2 a lemon
1/4 teaspoon + fine grain sea salt
1/3 cup extra-virgin olive oil
To cook the broccoli, salt the boiling water and add the broccoli. Cook for just twelve seconds. Drain immediately and run cold water over the broccoli to stop the cooking. Reserve a few of the small broccoli trees and puree the rest in a food processor along with the walnuts, garlic, lemon juice and salt. Drizzle in the olive oil while still blending. Taste, adjust with more salt or lemon juice if needed.
Serve over pasta!
Wednesday, July 30, 2008
Daring Bakers
 Strawberry Mirror Cake--July 2007
So it's time I do this for good--I need to resign from the group. I haven't been the best of posters, constantly too busy, too many emergencies, not enough money, and this month is a testament to that. I literally don't have the money to make the cake this month--I spent my last $4 on a big bunch of beans a giant zucchini at the Farmer's Market--I'm working a 50 hour week while still in class (which is creative writing, so there's a lot outside of class to do in addition to the 7 hours every week I have to be outside of my apartment). Anyway, all excuses aside, I need to quit.
 Cheesecake Pops--April 2008
It's been a lovely year (this would have been my 1st Daring Bakeversery) and I've truly enjoyed the challenges. The sticky buns were out of this world! The crepe cake was fucking fantastic! The cheesecake pops were uber yum! But sometimes I just need to let something go.
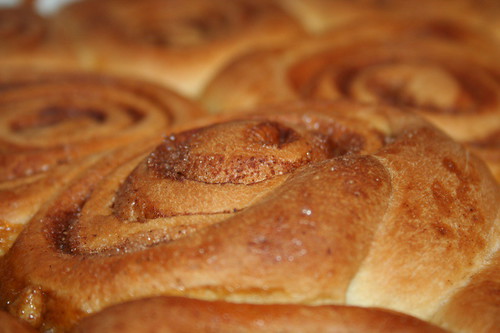 Sticky Buns--September 2007
Don't forget to check out the blogroll to read all about this month's challenge. The Filbert Gateaus with Praline Buttercream look amazing. Everyone rose to the recipe. And I'm going back to working and writing and cooking (and playing with my cats!). Have a beautiful Wednesday and I'll be back Friday with a real recipe!
Sunday, July 27, 2008
The Carbon-Free Home
I work for an independent book store, A Cappella Books, in Atlanta and, in addition to working in the store, I plan and execute book readings. Today I had the pleasure of finally meeting Stephen & Rebekah Hren, authors of The Carbon-Free Home: 36 Remodeling Projects to Help Kick the Fossil-Fuel Habit. Generally I'm not too psyched about the "green" books out on the market. "Being green" has reached fad magnitude, and even though I appreciate folks wanting to live more sustainably, some of the ideas and projects out there aren't cost-efficient or energy-efficient.
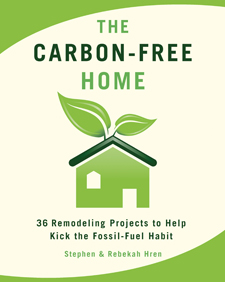
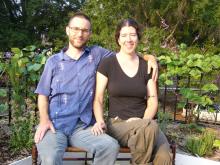
Stephen & Rebekah are two of the most down-to-earth super-friendly people I've met in awhile. I loved chatting with them about projects and how to keep my extremely hot apartment cool in the summer. One idea is to plant a deciduous vine like a grape vine in window boxes on my East-West windows. Using bamboo poles to form a trellis up the window, the vine will block out summer sun and then let in winter sun because the leaves will have fallen. Not only is it a cute idea, it's a cool one! (Pun sooo intended.)
I definitely recommend this book to anyone interested in cost and energy efficient DIY earth-friendly retrofitting of their house or apartment. Tons of the ideas are renter-friendly, and I'm totally enamored with the grow your own mushroom or potato barrel ideas. Seriously, in the food section, they tell you how to grow tasty mushrooms (Rebekah said they just harvested shitake mushrooms!), and plant a bucket with potatoes. I'm definitely going to try out the potato bucket idea, since 2nd harvest plants in mid-late August.
If you're interested in buying the book, you can get copies off Amazon or signed copies through A Cappella (scroll down the schedule list and "add to cart;" then specify in an e-mail that you want a signed copy).
Friday, July 25, 2008
Chocolate Chip Carrot Sunrise Muffins
Chocolate belongs in everything. That's why mole was invented. And in baked goods, it's even more of an "of course" type of thing. I had some carrots sitting around in my fridge that I needed to use up before they rotted and for some reason I really wanted a muffin with chocolate in it. Thus the Chocolate Chip Carrot Sunrise Muffins were invented. The recipe probably isn't unique. But it tastes good. And the orange color is so happy!
Nutritional Facts: Carrots are good for you. Chocolate is tasty and has caffeine. Spices are the bomb.
I riffed the recipe from Vegan with a Vengeance. Changed a few things, kept a few things. It was a good base.
 Chocolate Chip Carrot Sunrise Muffins
1 1/2 cups flour
2 tsp baking powder
1/2 tsp baking soda
1 tsp cinnamon
1 tsp powdered ginger
1/4 cup sugar
1 cup soy milk
1/4 cup vegetable oil
2 tsp vanilla extract
2 cups grated carrot (I made my pieces super small and juicy so they incorporated into the mix better)
1 cup chocolate chips
Preheat the oven to 400 degrees. Line a muffin tin with papers.
In a large mixing bowl, mix the carrots, oil, soy milk, vanilla, and sugar. Add the flour, spices, baking powder, baking soda and chocolate chips. Mix well.
Pour into the muffin papers and bake for 20 minutes until a knife inserted into the center comes out clean.
Wednesday, July 23, 2008
NYC Recap & Dorian Gray
I'm back! Miss me? So down to the nitty gritty. New York was tasty as ever (as if it couldn't be). I didn't take pictures of what I ate because, well, I just don't do that in restaurants. But here's a list of all the vegan meals I had and where I had them at (minus a Thai place in Park Slope & a place I ate a veggie burger at...can't remember the name either).

Curly's Vegetarian Lunch: Blue Plate Special Vegan Corn Dogs with French Fries, Vegan Sangria Milkshake. I ate the corn dogs last summer with Kyle and have been dreaming of them ever since. Totally worth the trek over the bridge to Manhattan. The sangria milkshake was decidedly pleasant too. Who knew that sangria would work well in a milkshake?! It reminded me of a lassi (the South Indian yogurt drink), but alcoholic. All the better!
Second Helpings: Just a snake of a Mushroom Spring Roll. Very delicious. The cafe isn't vegetarian, but most everything they serve is, and they have vegan baked goods. What's not to like?
The V-Spot: BRUNCH! (my favorite for this trip): Vegan Breakfast Burrito w/ side salad, a side of a Vegan Pancake, and a Vegan Mint Chocolate Chip Milkshake. The breakfast burrito was OUT OF THIS WORLD. As was the pancake. David said it was more like a crepe than a pancake. But the cinnamon and other sundry spices in the batter were delish. And the milkshake was amazing too. Noticing a trend yet? David ordered the steak and tofu and that was rockin' as well. I tried it, of course, and the seitan was seasoned perfectly. Plus their coffee has a hint of cinnamon. Yum!
Pizza Plus: Best vegan pizza I've ever had. We ordered a large wheat crust pie with mushrooms and sun dried tomatoes. The vegan cheese actually melted AND tasted cheesy. Even David, a die-hard cheese-eater thought it was delicious. Plus they have $3 Brooklyn Lagers. Who can resist? I reheated the pizza in the oven for lunch the next day and it tasted just as good. Leftover seal of approval.
Red Bamboo: This was my last vegan meal in NYC. I had the lunch special of Vegan Chicken Parmesean with a side of Collard Green Spring Roll. The chicken's texture was right-on and the diced tomatoes on top made the meal shine. The parmesean was ok, I guess, I mean, it didn't taste like anything special, but I loved it. I finished off the lunch with a Vegan Chocolate Milkshake.

We drank quite a bit, as can be imagined, and drink prices weren't as scary as I expected. $2 PBRs in Williamsburg, $3 Brooklyn Lagers, $6 Hefeweizen, $3 Stella Artois, etc.

Ok, so in other news, meet Miss Dorian Gray! She's 7 weeks old (I think) and is going to grow into the worlds largest kitty. Ok, maybe not world's largest, but she's got seriously huge back feet and I think she's got maine coon in her. So really, she's going to be big. She never stops purring, is unfazed by the fact that my cats hate her, and she's obsessed with batting my eye lashes (which is a little uncomfortable for me). Basically, she's the bomb.
Wednesday, July 16, 2008
New York! and Chocolate Pistachio Cream Cheese Danish Bread
Sorry for not posting in awhile. School. That's all I have to say about that.
However! I'm off to NYC for a week to visit friends, eat tasty vegan food, and pine over the fact that I couldn't fly my bike up with me this time. Sigh. At least I'll be hitting up the Siren Festival on Saturday (with the possibility of press/backstage passes...!) If you have any suggestions for food places or things to do, let me know. I've been to New York quite a few times, but always on my bike and with races and such going on, so this trip is really different for me.
I'll leave you for the week with my 2nd Danish Braid. This one I filled with vegan cream cheese, chocolate chips, and pistachios. My mom makes a danish bread type thing with chocolate chips and cream cheese every Christmas, so I thought I'd play around with that. Can anyone say instant amazing? You should. You should also make it. (smile)
I hope you all have a good week! Be back next Wednesday!
 Cream Cheese Chocolate Pistachio Danish Braid
1 recipe Danish Bread
1 8 oz Tofutti Cream Cheese
3 tbsp sugar
1 cup vegan chocolate chips
1/2 cup pistachios, chopped
Prepare Danish Bread per linked recipe.
In a bowl, whip the cream cheese and sugar together. Add more sugar if desired. Add chocolate chips and pistachios. Mix.
Fill Danish Braid recipe and bake as instructed.
Monday, July 7, 2008
Veganersary!
It's my first veganersary! Granted, I was not necessarily (ok, at all) completely vegan (for full story see my meme post) last July 7, and I get drunk and eat cheesy food (pun intended), and I love to eat Taria's pastry creations (she's fruitarian but the best pastry chef in Atlanta, so again, humor me), but it's been a good year. I wish I still had my old blog and could trace what I posted a year ago, but I can't. Sad.
I'm forever grateful to Rachael and Kyle and Taria for convincing me through their eating habits that veganism is totally possible--even when one is a pastry chef--and also to you guys, the blog community, for giving me hundreds of new recipes to try out and friendly support over much trial and error.
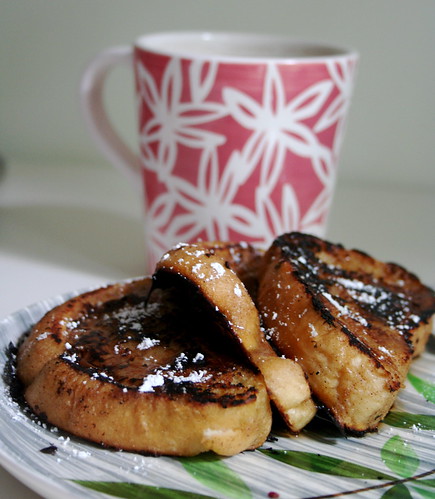
So, as a thanks and to celebrate, I'll leave you with a tasty breakfast. I know you all know how to make vegan french toast. And I usually make it with applesauce or smooshed bananas. Or sometimes super fancy with challah and vegan ricotta (smile). But with the usual recipe, the bread gets too much liquid in it and stays soggy, even if you fry it till it burns. So I experimented with a bit of vegan yogurt, added spices, fried it, and oh-my-goodness it was just like regular french toast! Crispy fried on the outside, not soggy on the inside, spicy-sweet...yeah, a pretty damn good simple veganersary breakfast.
Much love to you all, you're the best! Here's to another wonderful vegan food-filled year!
 Vegan French Toast
1/2 cup vegan vanilla yogurt
1 tsp cinnamon
1/2 tsp cardamom
1/2 tsp ginger
Mix together the yogurt and spices in a shallow, wide dish.
Dip the bread slices into the yogurt and cover both sides with the mixture.
Fry the bread over medium head with a dash of olive oil until brown on both sides.
Serve with maple syrup, powdered sugar, nuts, berries--whatever you feel like!
I'm forever grateful to Rachael and Kyle and Taria for convincing me through their eating habits that veganism is totally possible--even when one is a pastry chef--and also to you guys, the blog community, for giving me hundreds of new recipes to try out and friendly support over much trial and error.
So, as a thanks and to celebrate, I'll leave you with a tasty breakfast. I know you all know how to make vegan french toast. And I usually make it with applesauce or smooshed bananas. Or sometimes super fancy with challah and vegan ricotta (smile). But with the usual recipe, the bread gets too much liquid in it and stays soggy, even if you fry it till it burns. So I experimented with a bit of vegan yogurt, added spices, fried it, and oh-my-goodness it was just like regular french toast! Crispy fried on the outside, not soggy on the inside, spicy-sweet...yeah, a pretty damn good simple veganersary breakfast.
Much love to you all, you're the best! Here's to another wonderful vegan food-filled year!
 Vegan French Toast
1/2 cup vegan vanilla yogurt
1 tsp cinnamon
1/2 tsp cardamom
1/2 tsp ginger
Mix together the yogurt and spices in a shallow, wide dish.
Dip the bread slices into the yogurt and cover both sides with the mixture.
Fry the bread over medium head with a dash of olive oil until brown on both sides.
Serve with maple syrup, powdered sugar, nuts, berries--whatever you feel like!
Thursday, July 3, 2008
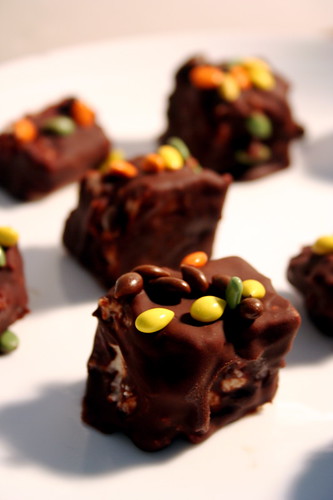
Chocolate Chip Pistachio Cookies
OH the things you can do with pistachios. Lemee tell ya...
So a couple of weeks ago I was in a pretty major funk. Things on the school front were not looking well (my funding was pulled over an administrative mistake--it's back, thank god), the poet was out of town and we'd had a tiff before he left, and I was not in the mood to face life. So I reverted to my old funk tactics. I checked three 200+ page books out of the library and vowed to stay in bed (it's 90+ degrees outside, ewww) until I read them all. A book a day. But one needs sustenance when huddled in bed with the A/C on high, cats cuddled around legs. You need chocolate chip cookies. It's the only funk food that will suffice.
I riffed off the recipe from The Joy of Vegan Baking, which, honestly, I'm not too fond of. But it could remind me of the correct flour and sugar measurements and such. And with pitachios sitting around in my cupboard, well, you can imagine how this recipe turned out. DELICIOUS. It satisfied my craving almost as well as the original eggy chocolate chip cookie recipe I made for years. I've yet to find a vegan chocolate chip cookie that passes muster, but this wasn't too bad.
As a note, I might suggest lessening the sugar to 1/2 and 1/2 with a pinch thrown in or something like that if you use vanilla yogurt like I did. I might also lessened the vanilla a bit. I don't like my cookies super sweet, and these were a bit on the edge of too sweet for me. Other than that, I like using the yogurt as an egg replacer.
 Chocolate Chip Pistachio Cookies
1 cup Earth Balance
3/4 cup brown sugar
3/4 cup white sugar
2 tsp vanilla extract
1/2 cup vanilla soy yogurt
2 1/4 cup flour
1 tsp baking soda
1 tsp salt
2 cups chocolate chips (I use Ghiradelli semi-sweet--vegan!)
1 cup chopped pistachios
Preheat the oven to 350.
In a large bowl, cream the butter, sugars, and vanilla. Add the soy yogurt and mix well.
Beat in the flour, baking soda, and salt in small batches until it forms a dough. You might need to add more flour.
When it is thoroughly combined, add the chocolate chips and pistachios.
Form small balls of dough and place on a non-stick cookie sheet. Bake for 8-10 minutes or until the golden brown you want.
Let them cool as long as you can wait--I suggest not waiting so as to get the perfect combo of hot dough and gooey chocolate chips.
Tuesday, July 1, 2008
Pistachio Crusted Tofu
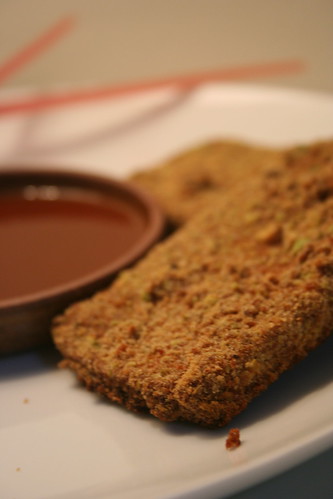
Remember Shake n' Bake? That glorious mix of bread crumbs and parmesean and god-knows-what-else-but-it-was-tasty? Yeah, I miss it sometimes. Who knows, maybe there's a by-accident vegan Shake n' Bake out there, but it wouldn't be right without the chicken. Do I miss chicken? No. I just miss the baked crusty deliciousness of what's put on chicken sometimes.
Thank God there's Susan and her blog. If I hadn't stupidly deleted all my original posts on here, you'd realize that I got into blogging (in part) because of her and her recipes. She definitely helped me go vegan. The Pistachio Crusted Tofu is her recipe and it's damn tasty. It's Shake n' Bake meets tofu. It's everything I crave of the good ol' midwestern meat and potatoes that I grew up on. I can't stop raving about it. Plus it was so so so easy. I tweaked the sweet and sour dipping sauce a bit, but other than that, all the praise goes out to Susan.
14 ounces tofu
2 tablespoons soy sauce, low sodium
1 cup whole wheat bread crumbs
1/2 cup pistachio nuts
ground pepper -- to taste
2 tablespoons spicy mustard
2 tablespoons maple syrup
1/2 tablespoon soy sauce, low sodium
1 tablespoon tofu mayonnaise
Preheat oven to 400F; prepare a baking sheet by either oiling it lightly.
Cut the tofu into 8 1/2-inch slices and dry them lightly with paper towels. Brush both sides of the tofu with the 2 tablespoons soy sauce and set aside to marinate for at least 10 minutes.
While the tofu is marinating, measure out 1 cup of crumbs into a wide, shallow bowl. Pulse the pistachios in a food processor until they are reduced to fine crumbs. Add them to the bread crumbs along with a generous grating of black pepper, and mix well.
In another shallow bowl, combine the mustard, syrup, soy sauce, and mayo.
Dip a slice of tofu into the mustard mixture, lightly coating all sides; then place it into the bread crumbs, sprinkle crumbs over the top and sides, and lightly press them into the tofu. Place on the prepared baking sheet. Repeat with all slices of tofu.
Put the tofu into the oven and bake for 20 minutes, or until bread crumbs are golden brown.
Serve with the sauce of your choice, such as the Easy Sweet and Sour Sauce below.
Sweet and Sour Sauce (riffed from SusanV)
3 tablespoons apple butter
1 1/2 tablespoons rice wine vinegar
1/2 tablespoon soy sauce, low sodium
1/2 teaspoon chili paste
Mix all ingredients together well. Serve over tofu.
Sunday, June 29, 2008
Daring Bakers Danish Braid Bread
So.... it's been one month since I posted... I needed (kneaded?) the month off. My uber intense French translation class just ended (god knows how the final grade will turn out--but it's over, that's what counts!), I'm finally 100% healthy, and I'm back in the cooking/baking realm again.
This month's Daring Bakers Challenge was picked by Kelly of Sass & Veracity and Ben of What's Cookin'? and they picked a decently easy Danish Braid recipe. The only catch is that it takes either one entire day or two days to complete. But the hands-on time was not long at all and the whole recipe was wonderfully simple. And easy to veganize. (smile) It's always a plus when the DB challenge doesn't call for one dozen eggs.
 For the dough, I substituted vegan yogurt for the eggs, Earth Balance for the butter, and soymilk for the whole milk. I think my kneading/rolling technique was a bit too intense because the bread isn't as flaky as I'd like, but it's still damn delicious. Kyle, the friend who turned me vegan (in the nicest way possible) is back from Thailand and living on my couch, and he gave the bread 2 thumbs up.
The butter block and the apple filling just needed an Earth Balance for butter substitute.
All in all, a fun, easy challenge and a great way to get back into the kitchen and the blog world. I promise to not disappear again for a month!
 Danish Braid
Danish Dough
Makes 2-1/2 pounds dough
For the dough (Detrempe)
1 ounce fresh yeast or 1 tablespoon active dry yeast
1/2 cup soy milk
1/3 cup sugar
3/4 teaspoon ground cardamom
1-1/2 teaspoons vanilla extract
1/2 cup vanilla soy yogurt
1/4 cup fresh orange juice
3-1/4 cups all-purpose flour
1 teaspoon salt
For the butter block (Beurrage)
1/2 pound (2 sticks) Earth Balance
1/4 cup all-purpose flour
Dough
Combine yeast and milk in a bowl with a hand mixer on low speed or a whisk. Add sugar, cardamom, vanilla extract, yogurt, and orange juice and mix well.
Sift flour and salt on your working surface and make a fountain. Make sure that the “walls” of your fountain are thick and even. Pour the liquid in the middle of the fountain. With your fingertips, mix the liquid and the flour starting from the middle of the fountain, slowly working towards the edges.
When the ingredients have been incorporated start kneading the dough with the heel of your hands until it becomes smooth and easy to work with, around 5 to 7 minutes. You might need to add more flour if the dough is sticky.
Butter Block
Combine Earth Balance and flour in the bowl of a mixer fitted with a paddle attachment and beat on medium speed for 1 minute. Scrape down the sides of the bowl and the paddle and then beat for 1 minute more, or until smooth and lump free. Set aside at room temperature.
After the detrempe has chilled 30 minutes, turn it out onto a lightly floured surface. Roll the dough into a rectangle approximately 18 x 13 inches and ¼ inch thick. The dough may be sticky, so keep dusting it lightly with flour. Spread the butter evenly over the center and right thirds of the dough. Fold the left edge of the detrempe to the right, covering half of the butter. Fold the right third of the rectangle over the center third. The first turn has now been completed. Mark the dough by poking it with your finger to keep track of your turns, or use a sticky and keep a tally. Place the dough on a baking sheet, wrap it in plastic wrap, and refrigerate for 30 minutes.
Place the dough lengthwise on a floured work surface. The open ends should be to your right and left. Roll the dough into another approximately 13 x 18 inch, ¼-inch-thick rectangle. Again, fold the left third of the rectangle over the center third and the right third over the center third. No additional butter will be added as it is already in the dough. The second turn has now been completed. Refrigerate the dough for 30 minutes.
Roll out, turn, and refrigerate the dough two more times, for a total of four single turns. Make sure you are keeping track of your turns. Refrigerate the dough after the final turn for at least 5 hours or overnight. The Danish dough is now ready to be used. If you will not be using the dough within 24 hours, freeze it. To do this, roll the dough out to about 1 inch in thickness, wrap tightly in plastic wrap, and freeze. Defrost the dough slowly in the refrigerator for easiest handling. Danish dough will keep in the freezer for up to 1 month.
Apple Filling
4 Granny Smith apples, peeled, cored, and cut into ¼-inch pieces
1/2 cup sugar
1 tsp. ground cinnamon
1 tsp. vanilla extract
1/4 cup fresh lemon juice
4 tablespoons Earth Balance
Toss all ingredients except butter in a large bowl.
Melt the Earth Balance in a sauté pan over medium heat until slightly nutty in color, about 6 - 8 minutes.
Then add the apple mixture and sauté until apples are softened and caramelized, 10 to 15 minutes.
Pour the cooked apples onto a baking sheet to cool completely before forming the braid. (If making ahead, cool to room temperature, seal, and refrigerate.) They will cool faster when spread in a thin layer over the surface of the sheet.
After they have cooled, the filling can be stored in the refrigerator for up to 3 days. Left over filling can be used as an ice cream topping, for muffins, cheesecake, or other pastries.
Danish Braid
1/2 recipe Danish Dough
2 cups apple filling
Line a baking sheet with a silicone mat or parchment paper. On a lightly floured surface, roll the Danish Dough into a 15 x 20-inch rectangle, ¼ inch thick. If the dough seems elastic and shrinks back when rolled, let it rest for a few minutes, then roll again. Place the dough on the baking sheet.
Along one long side of the pastry make parallel, 5-inch-long cuts with a knife or rolling pastry wheel, each about 1 inch apart. Repeat on the opposite side, making sure to line up the cuts with those you’ve already made.
Spoon the filling to fill your braid down the center of the rectangle. Starting with the top and bottom “flaps”, fold the top flap down over the filling to cover. Next, fold the bottom “flap” up to cover filling. This helps keep the braid neat and helps to hold in the filling. Now begin folding the cut side strips of dough over the filling, alternating first left, then right, left, right, until finished. Trim any excess dough and tuck in the ends.
Proofing and Baking
Spray cooking oil onto a piece of plastic wrap, and place over the braid. Proof at room temperature or, if possible, in a controlled 90 degree F environment for about 2 hours, or until doubled in volume and light to the touch.
Near the end of proofing, preheat oven to 400 degrees F. Position a rack in the center of the oven.
Bake for 10 minutes, then rotate the pan so that the side of the braid previously in the back of the oven is now in the front. Lower the oven temperature to 350 degrees F, and bake about 15-20 minutes more, or until golden brown. Cool and serve the braid either still warm from the oven or at room temperature. The cooled braid can be wrapped airtight and stored in the refrigerator for up to 2 days, or freeze for 1 month.
Thursday, May 29, 2008
May Daring Bakers Challenge
Mono + Daring Bakers Challenge = oops. I forgot. And I don't have the ingredients in my house. And I'm posting this a day late anyway. I'll have it by the weekend--promise!
Tuesday, May 20, 2008
Doughnut-Cake-Coffee Cake-Awesomeness
Classes just finished, right? I mean, did I miss something? Oh... yeah... the part about me adding French to my course load so I can get enough semesters in to hopefully get into a good Comparative Literature PhD program next year. Sigh.
And you know what class means? Coffee. Actually, French isn't too bad. I took it back in high school and I'm more interested in translation than conversation, so I'm not stressed at all about it. It should be an easy GPA boost. HOWEVER, my schedule is a bit wonky with scholarship apps (ahhh Fulbright, Marshall, Mitchell, and Bobby Jones... four apps.... ugh...), studying for the GRE, pulling together enough poetry for a good portfolio for MFA programs, reading Deleuze and Beckett for my thesis, and hopefully cracking Being and Time. Did I mention that I'm working part time for two different jobs too?
This. This is why I need coffee. And coffee cake!
I'm in love with Vegan Visitor. It's true. I like the layout, the photography is gorgeous, and the recipes are tasty as hell. If hell were tasty--which I'm not sure it is... Anyways. After reading the post and recipe for the Also Goes With Tea Coffee Cake, I knew I needed to make it. Need is a rather open term for me, but it applies. I swear.
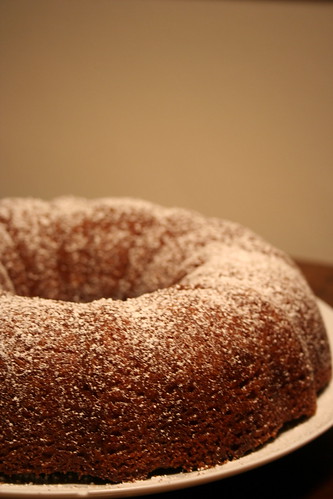
After substituting pecans for walnuts, adding a bit of chocolate, baking in a bundt pan, dusting with powdered sugar--oh my gosh fingerlicking good. Unfortunately, I couldn't get a good shot of the layering of the coffee cake. It was eaten a bit too quickly. Oops! The Poet gave it two thumbs, two big toes, and a happy belly up. Personally, I think it tastes like a doughnut, and then a cake, and then coffee cake--all at the same time. It goes great with coffee, tea, soy milk, after dinner, before dinner, whenever. I had to give half of it away. Otherwise I'd eat it all. In a period of two days. Summer--the perfect season for baking induced weight! Right?
 Doughnut-Cake-Coffee Cake-Awesomeness
1 c Granulated Sugar
1/2 c Earth Balance Margarine, softened
1 Tbsp Baking Powder
1 c Soy Vanilla Yogurt
1/2 c Plain Soy Milk
1 tsp baking soda
1 c All Purpose Flour
1/2 c Whole Wheat Flour
For the Topping:
1 c Pecans broken
1 c Vegan Chocolate Chips
1/3 c Brown Sugar
1 tsp Cinnamon
Preheat the oven to 350ºF.
Toss the pecans, chocolate chips, brown sugar and cinnamon in a small bowl and set aside.
Cream the sugar with the margarine, then add the baking powder and continue to mix until fluffy.
In a measuring cup, combine the yogurt, soy milk and baking soda.
Add half of the yogurt mixture to the creamed sugar, then half of the flour, mixing until each is combined, repeating with the remainder.
Lightly spray and dust a bundt pan with flour.
Add half of the cake batter to the pan. Add half of the walnut topping. Finish with the remaining batter, then evenly sprinkle over the last of the topping.
Bake in the center of the oven for 45 - 50 minutes.
Cool completely in the pan before turning it out to a serving plate.
And you know what class means? Coffee. Actually, French isn't too bad. I took it back in high school and I'm more interested in translation than conversation, so I'm not stressed at all about it. It should be an easy GPA boost. HOWEVER, my schedule is a bit wonky with scholarship apps (ahhh Fulbright, Marshall, Mitchell, and Bobby Jones... four apps.... ugh...), studying for the GRE, pulling together enough poetry for a good portfolio for MFA programs, reading Deleuze and Beckett for my thesis, and hopefully cracking Being and Time. Did I mention that I'm working part time for two different jobs too?
This. This is why I need coffee. And coffee cake!
I'm in love with Vegan Visitor. It's true. I like the layout, the photography is gorgeous, and the recipes are tasty as hell. If hell were tasty--which I'm not sure it is... Anyways. After reading the post and recipe for the Also Goes With Tea Coffee Cake, I knew I needed to make it. Need is a rather open term for me, but it applies. I swear.
After substituting pecans for walnuts, adding a bit of chocolate, baking in a bundt pan, dusting with powdered sugar--oh my gosh fingerlicking good. Unfortunately, I couldn't get a good shot of the layering of the coffee cake. It was eaten a bit too quickly. Oops! The Poet gave it two thumbs, two big toes, and a happy belly up. Personally, I think it tastes like a doughnut, and then a cake, and then coffee cake--all at the same time. It goes great with coffee, tea, soy milk, after dinner, before dinner, whenever. I had to give half of it away. Otherwise I'd eat it all. In a period of two days. Summer--the perfect season for baking induced weight! Right?
 Doughnut-Cake-Coffee Cake-Awesomeness
1 c Granulated Sugar
1/2 c Earth Balance Margarine, softened
1 Tbsp Baking Powder
1 c Soy Vanilla Yogurt
1/2 c Plain Soy Milk
1 tsp baking soda
1 c All Purpose Flour
1/2 c Whole Wheat Flour
For the Topping:
1 c Pecans broken
1 c Vegan Chocolate Chips
1/3 c Brown Sugar
1 tsp Cinnamon
Preheat the oven to 350ºF.
Toss the pecans, chocolate chips, brown sugar and cinnamon in a small bowl and set aside.
Cream the sugar with the margarine, then add the baking powder and continue to mix until fluffy.
In a measuring cup, combine the yogurt, soy milk and baking soda.
Add half of the yogurt mixture to the creamed sugar, then half of the flour, mixing until each is combined, repeating with the remainder.
Lightly spray and dust a bundt pan with flour.
Add half of the cake batter to the pan. Add half of the walnut topping. Finish with the remaining batter, then evenly sprinkle over the last of the topping.
Bake in the center of the oven for 45 - 50 minutes.
Cool completely in the pan before turning it out to a serving plate.
Subscribe to:
Posts (Atom)