Showing posts with label bread. Show all posts

Wednesday, July 16, 2008

New York! and Chocolate Pistachio Cream Cheese Danish Bread

Sorry for not posting in awhile. School. That's all I have to say about that.

However! I'm off to NYC for a week to visit friends, eat tasty vegan food, and pine over the fact that I couldn't fly my bike up with me this time. Sigh. At least I'll be hitting up the Siren Festival on Saturday (with the possibility of press/backstage passes...!) If you have any suggestions for food places or things to do, let me know. I've been to New York quite a few times, but always on my bike and with races and such going on, so this trip is really different for me.

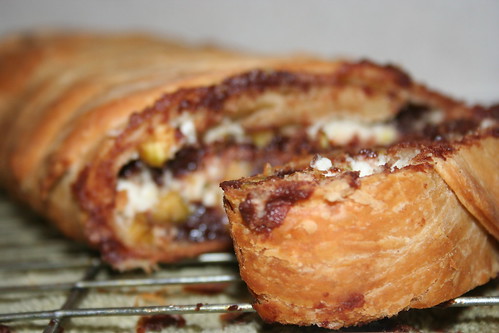
I'll leave you for the week with my 2nd Danish Braid. This one I filled with vegan cream cheese, chocolate chips, and pistachios. My mom makes a danish bread type thing with chocolate chips and cream cheese every Christmas, so I thought I'd play around with that. Can anyone say instant amazing? You should. You should also make it. (smile)

I hope you all have a good week! Be back next Wednesday!

Cream Cheese Chocolate Pistachio Danish Braid

1 recipe Danish Bread

1 8 oz Tofutti Cream Cheese
3 tbsp sugar
1 cup vegan chocolate chips
1/2 cup pistachios, chopped


Prepare Danish Bread per linked recipe.

In a bowl, whip the cream cheese and sugar together. Add more sugar if desired. Add chocolate chips and pistachios. Mix.

Fill Danish Braid recipe and bake as instructed.

Sunday, June 29, 2008

Daring Bakers Danish Braid Bread

So.... it's been one month since I posted... I needed (kneaded?) the month off. My uber intense French translation class just ended (god knows how the final grade will turn out--but it's over, that's what counts!), I'm finally 100% healthy, and I'm back in the cooking/baking realm again.

This month's Daring Bakers Challenge was picked by Kelly of Sass & Veracity and Ben of What's Cookin'? and they picked a decently easy Danish Braid recipe. The only catch is that it takes either one entire day or two days to complete. But the hands-on time was not long at all and the whole recipe was wonderfully simple. And easy to veganize. (smile) It's always a plus when the DB challenge doesn't call for one dozen eggs.

For the dough, I substituted vegan yogurt for the eggs, Earth Balance for the butter, and soymilk for the whole milk. I think my kneading/rolling technique was a bit too intense because the bread isn't as flaky as I'd like, but it's still damn delicious. Kyle, the friend who turned me vegan (in the nicest way possible) is back from Thailand and living on my couch, and he gave the bread 2 thumbs up.

The butter block and the apple filling just needed an Earth Balance for butter substitute.

All in all, a fun, easy challenge and a great way to get back into the kitchen and the blog world. I promise to not disappear again for a month!

Danish Braid

Danish Dough

Makes 2-1/2 pounds dough

For the dough (Detrempe)
1 ounce fresh yeast or 1 tablespoon active dry yeast
1/2 cup soy milk
1/3 cup sugar
3/4 teaspoon ground cardamom
1-1/2 teaspoons vanilla extract
1/2 cup vanilla soy yogurt
1/4 cup fresh orange juice
3-1/4 cups all-purpose flour
1 teaspoon salt


For the butter block (Beurrage)
1/2 pound (2 sticks) Earth Balance
1/4 cup all-purpose flour


Dough
Combine yeast and milk in a bowl with a hand mixer on low speed or a whisk. Add sugar, cardamom, vanilla extract, yogurt, and orange juice and mix well.

Sift flour and salt on your working surface and make a fountain. Make sure that the “walls” of your fountain are thick and even. Pour the liquid in the middle of the fountain. With your fingertips, mix the liquid and the flour starting from the middle of the fountain, slowly working towards the edges.

When the ingredients have been incorporated start kneading the dough with the heel of your hands until it becomes smooth and easy to work with, around 5 to 7 minutes. You might need to add more flour if the dough is sticky.

Butter Block
Combine Earth Balance and flour in the bowl of a mixer fitted with a paddle attachment and beat on medium speed for 1 minute. Scrape down the sides of the bowl and the paddle and then beat for 1 minute more, or until smooth and lump free. Set aside at room temperature.

After the detrempe has chilled 30 minutes, turn it out onto a lightly floured surface. Roll the dough into a rectangle approximately 18 x 13 inches and ¼ inch thick. The dough may be sticky, so keep dusting it lightly with flour. Spread the butter evenly over the center and right thirds of the dough. Fold the left edge of the detrempe to the right, covering half of the butter. Fold the right third of the rectangle over the center third. The first turn has now been completed. Mark the dough by poking it with your finger to keep track of your turns, or use a sticky and keep a tally. Place the dough on a baking sheet, wrap it in plastic wrap, and refrigerate for 30 minutes.

Place the dough lengthwise on a floured work surface. The open ends should be to your right and left. Roll the dough into another approximately 13 x 18 inch, ¼-inch-thick rectangle. Again, fold the left third of the rectangle over the center third and the right third over the center third. No additional butter will be added as it is already in the dough. The second turn has now been completed. Refrigerate the dough for 30 minutes.

Roll out, turn, and refrigerate the dough two more times, for a total of four single turns. Make sure you are keeping track of your turns. Refrigerate the dough after the final turn for at least 5 hours or overnight. The Danish dough is now ready to be used. If you will not be using the dough within 24 hours, freeze it. To do this, roll the dough out to about 1 inch in thickness, wrap tightly in plastic wrap, and freeze. Defrost the dough slowly in the refrigerator for easiest handling. Danish dough will keep in the freezer for up to 1 month.

Apple Filling


4 Granny Smith apples, peeled, cored, and cut into ¼-inch pieces
1/2 cup sugar
1 tsp. ground cinnamon
1 tsp. vanilla extract
1/4 cup fresh lemon juice
4 tablespoons Earth Balance


Toss all ingredients except butter in a large bowl.

Melt the Earth Balance in a sauté pan over medium heat until slightly nutty in color, about 6 - 8 minutes.

Then add the apple mixture and sauté until apples are softened and caramelized, 10 to 15 minutes.

Pour the cooked apples onto a baking sheet to cool completely before forming the braid. (If making ahead, cool to room temperature, seal, and refrigerate.) They will cool faster when spread in a thin layer over the surface of the sheet.

After they have cooled, the filling can be stored in the refrigerator for up to 3 days. Left over filling can be used as an ice cream topping, for muffins, cheesecake, or other pastries.

Danish Braid


1/2 recipe Danish Dough
2 cups apple filling

Line a baking sheet with a silicone mat or parchment paper. On a lightly floured surface, roll the Danish Dough into a 15 x 20-inch rectangle, ¼ inch thick. If the dough seems elastic and shrinks back when rolled, let it rest for a few minutes, then roll again. Place the dough on the baking sheet.

Along one long side of the pastry make parallel, 5-inch-long cuts with a knife or rolling pastry wheel, each about 1 inch apart. Repeat on the opposite side, making sure to line up the cuts with those you’ve already made.

Spoon the filling to fill your braid down the center of the rectangle. Starting with the top and bottom “flaps”, fold the top flap down over the filling to cover. Next, fold the bottom “flap” up to cover filling. This helps keep the braid neat and helps to hold in the filling. Now begin folding the cut side strips of dough over the filling, alternating first left, then right, left, right, until finished. Trim any excess dough and tuck in the ends.
Proofing and Baking

Spray cooking oil onto a piece of plastic wrap, and place over the braid. Proof at room temperature or, if possible, in a controlled 90 degree F environment for about 2 hours, or until doubled in volume and light to the touch.

Near the end of proofing, preheat oven to 400 degrees F. Position a rack in the center of the oven.

Bake for 10 minutes, then rotate the pan so that the side of the braid previously in the back of the oven is now in the front. Lower the oven temperature to 350 degrees F, and bake about 15-20 minutes more, or until golden brown. Cool and serve the braid either still warm from the oven or at room temperature. The cooled braid can be wrapped airtight and stored in the refrigerator for up to 2 days, or freeze for 1 month.
Monday, April 7, 2008

Curry Pie

I have a problem. I love curry. I love my wok. I have no idea how to cook for one person.

Before I moved, I had a bunch of mushrooms that were about to go bad. I also had a bag of frozen peas. And, per usual, tons of spices and curry pastes and coconut milk and the like. Logical conclusion--make curry. It was a great idea until I added too much curry paste, setting my mouth on fire (and mind you, I adore super hot and spicy food), attempted to fix the heat with extra coconut milk (a dash of lemon juice did the trick somehow...I've no idea how the chemistry behind that works or if it were a fluke), added chickpeas and some other random odds and ends, and then added cornstarch to thicken it because I had an entire wok full of curry soup. Delicious curry soup, but I wasn't going for soup at this point. And I had an entire wok full of it.

I ate some, pawned some off on friends (not like I was twisting anyone's arm or anything), ate some more, ate some more. Almost a week later--sick of curry. Sick of curry with two tupperware dishes left of it. Crap.

Solution? Let them eat pie. Curry pie. I whipped up some whole wheat vegan puff pastry, rolled it out, lined a pie dish with it, filled it with curry, topped it with puff pastry, and baked it for over an hour. The pastry was thick, so it took forever, but Holy Mary Oh My God the end result was orgasmic. And maybe it was that good simply because I'm a carb fiend and anything in bread is delicious, but damn, I did good.

Moral of the story: whenever you have leftovers that you're sick of, make it into a pie. A pot pie. A shepherd's pie. A puff pastry pie. A whatever pie. It's like a caserole, only classier. Or something. Or maybe just more delicious. (smile)

Below is the original recipe I used for the curry. I added much more curry paste than it called for. You can adjust the amount to taste.

Oh, and let me tell you, taking a good picture of this thing was not easy. Just trust me: it tastes 800x better than it looks.

Curry Pie

For the Curry:
1-2 tbsp oil (I use a mixture of olive oil and vegetable oil)
1 onion, diced
4-5 garlic cloves, crushed
1-2 lb button mushrooms
1-2 cups frozen green peas
1 cup chickpeas
2 green chiles, seeded (I use Thai chiles)
2 tsp ground coriander
2 tsp ground cumin
1 tsp chili powder
1 tbsp curry paste (I used red, and much more than 1 tbsp: adjust to taste)
1 cup coconut milk
salt to taste
cornstarch, as needed


Clean the mushrooms and remove stalks. Depending on the size, halve or quarter them. Slice the chiles in half, and de-seed them with a spoon. Dice the chiles into small pieces. Dice the onion.

Add 1-2 tbsp oil to the pan, add the onion, chiles, and garlic and cook for 2 to 3 minutes, until the onion is clear. Add the mushrooms and cook 3 to 4 minutes until golden brown.

Add the spices, peas, chickpeas, coconut milk, and curry paste, and reduce the heat. Simmer, uncovered, 10 minutes, or until mushrooms are tender.

If there is too much liquid, add cornstarch a teaspoon at a time, stir the mixture, and allow it to thicken until you reach the desired consistency.

For the Puff Pastry (from dr. stonielove's bewildered beast):
Note: I doubled the recipe for the top and the bottom, but I did have leftover dough
2 cups whole wheat flour
2 cups all-purpose flour
1 cup soy margarine
2 cups cold water
2 tsp salt


Mix the flour and salt with cubed margarine to create cornmeal like texture. Create a well in the middle and slowly incorporate to form a dough.

Rest the dough for 30 minutes in the fridge (DO NOT KNEAD!). After 30 minutes, take out the dough from the fridge.

Flour the surface of a board, a roller, and the dough. Seperate teh dough into two balls. Roll the each ball into a rectangular with a ratio of 1x3. Fold the it twice to make a square. Repeat it at least 5 times with each ball of dough.

Final Assembly:
Preheat the oven to 350.

Roll out each portion of dough into a layer for the crust bottom and top. My thickness was about 1/8". Line a pie pan with the dough and fill to brim with curry. Place the other rolled out portion of dough on top to form a top crust. Poke holes or a design in the crust to allow for expansion (you don't really want the pie to explode, trust me).

Bake at 350 for 45 minutes to an hour, or until the crust is light brown.

Sunday, March 16, 2008

Hostel Bread

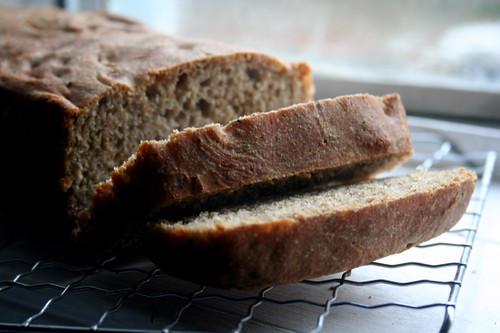
Everyone is ok--some friends ended up with trees on their houses, one lost all her trees in her yard, one is banned from his loft until the insurance company decides what to do, but everyone is alive and well. It stormed again yesterday afternoon, but no tornadoes (just hail and too much rain), and now it's sunny and 64 degrees. Go figure.

But sometimes you just need bread to make the storms go away. That's my philosophy at least.

Hostel Bread

1 cup warm water
1 tablespoon sugar
2.25 teaspoons active dry yeast
1 cup wheat flour
1-3 cups bread flour
2 tablespoons melted butter
1 tablespoon Sweet Basil
1 tablespoon Oregano
1 teaspoon Sage

Put warm water in a large bowl, and add sugar, stir until dissolved. Add the yeast next, and wait a few minutes for the yeast to dissolve. (The yeast feeds on the sugar, thus the bread must be made in this order.

Next, stir in one cup of wheat flour and one cup of bread flour. The wheat adds the nutrition to your bread, the bread flour makes it easier to knead. Add your butter at this time as well, and all the spices. Mix all this together, adding more flour as needed. The mixture should be somewhat stretchy, and not stick to your hands.

Transfer the bread dough to a greased, covered bowl, and put in a warm place. We usually use the same bowl as was used to mix the bread, just removing the dough, greasing the bowl, and returning its contents. Let rise for one hour, then punch down and transfer to a greased bread pan. Let rise for another hour, and put in an oven preheated to 450. Bake for 10 minutes, then reduce the oven to 350 degrees. Bake for another 30 minutes, remove from the oven, and let sit for 20 minutes before cutting to serve.

Monday, November 26, 2007

Daring Bakers Potato Bread

I moved the day after Thanksgiving and I don't have internet yet, so my post is a bit on the late (but still on time!) end this month.

This month Tanna of My Kitchen In Half Cups chose "Tender Potato Bread" as the November Daring Bakers challenge. I love bread! And it's automatically vegan. From the get-go I was excited about the recipe. In the spirit of an already DB vegan recipe I decided to follow it to the letter of the law. So on Thanksgiving morning (mind you, I'm hosting Thanksgiving at my house this year--for the first time ever...) I woke up and started on the delicious carbohydrate goodness.

Following the recipe EXACTLY was a bad bad bad idea. DO NOT add in all of the water first. I used, I swear to god, 8-10 cups of flour and the dough was still hell to work with. Sticky, soppy, sad sad mess. Luckily my mom was at my house by the time I tried to shape the rolls and she gave me a helping hand. It was a two person job. Seriously, the dough was ridiculous.

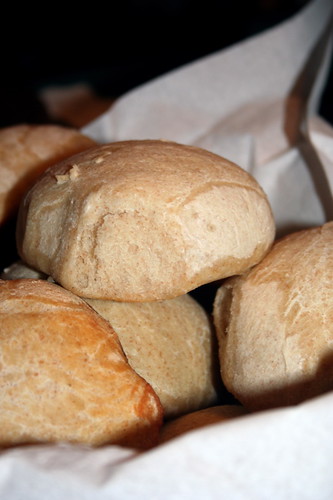
The rolls, however, were taaaasty. Mmm mmm good. They were soft and sourdoughy and perfect for a mixed vegan-meaty Thanksgiving dinner. Because the dough was so hard to work with, the rolls didn't turn our nearly as pretty as I was hoping. They were huge and moundish...but the taste is what matters.

I would totally make this recipe again (I'm still eating off of it now!), but I would recommend adding HALF of the water and at the end, when you're kneading, probably, add more water or flour as needed. Adding all of the water and then trying to add enough flour was a mess and a pain in the ass (pardon my french, I'm young, it comes second nature to me) and got flour all over the kitchen--my clothes were thrown into the hamper as soon as I was done attempting to knead the stickyness.

Anyways, here's the recipe. Bake if you dare!

Potato Rolls

4 medium to large floury (baking) potatoes, peeled and cut into chunks variety of potatoes you might want to use would include Idaho, Russet & Yukon gold
4 cups water
1 tablespoon plus 1 teaspoon salt
2 teaspoons active dry yeast
6 ½ cups to 8 ½ cups unbleached all-purpose flour
1 tablespoon unsalted butter, softened
1 cup whole wheat flour


Put the potatoes and 4 cups water in a sauce pan and bring to boil. Add 1 teaspoon salt and cook, half covered, until the potatoes are very tender.

Drain the potatoes, SAVE THE POTATO WATER, and mash the potatoes well.

Measure out 3 cups of the reserved potato water (add extra water if needed to make 3 cups). Place the water and mashed potatoes in the bowl you plan to mix the bread in – directions will be for by hand. Let cool to lukewarm – stir well before testing the temperature – it should feel barely warm to your hand. You should be able to submerge you hand in the mix and not be uncomfortable.

Mix & stir yeast into cooled water and mashed potatoes & water and let stand 5 minutes.
Then mix in 2 cups of all-purpose flour and mix. Allow to rest several minutes.

Sprinkle on the remaining 1 tablespoon salt and the softened butter; mix well. Add the 1 cup whole wheat flour, stir briefly.

Add 2 cups of the unbleached all-purpose flour and stir until all the flour has been incorporated.

At this point you have used 4 cups of the possible 8 ½ cups suggested by the recipe.

Turn the dough out onto a generously floured surface and knead for about 10 minutes, incorporating flour as needed to prevent sticking. The dough will be very sticky to begin with, but as it takes up more flour from the kneading surface, it will become easier to handle; use a dough scraper to keep your surface clean. The kneaded dough will still be very soft.

Place the dough in a large clean bowl or your rising container of choice, cover with plastic wrap or lid, and let rise about 2 hours or until doubled in volume.

Turn the dough out onto a well-floured surface and knead gently several minutes. It will be moist and a little sticky.

Divide the dough into 2 unequal pieces in a proportion of one-third and two-thirds (one will be twice as large as the other). Place the smaller piece to one side and cover loosely.

Butter a 13 x 9 inch sheet cake pan or a shallow cake pan. Cut the dough into 12 equal pieces. Shape each into a ball under the palm of your floured hand and place on the baking sheet, leaving 1/2 inch between the balls. Cover with plastic wrap and let rise for about 35 minutes, until puffy and almost doubled.

Dust risen rolls with a little all-purpose flour or lightly brush the tops with a little melted butter or olive oil (the butter will give a golden/browned crust). Slash crosswise two or three times with a razor blade or very sharp knife and immediately place on the stone, tiles or baking sheet in the oven.

Bake rolls until golden, about 30 minutes.

Friday, November 9, 2007

Vegan Challah

Who doesn't love bread? Who doesn't love a heaping, unhealthy dose of carbohydrates?

Exactly.


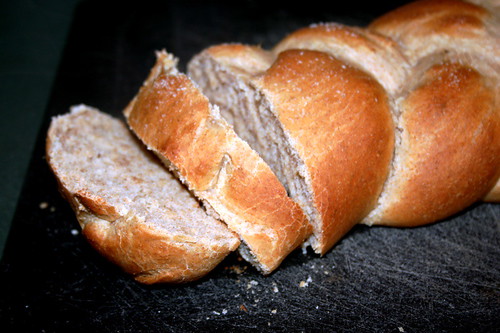
I'd been eyeing the PPK's recipe database recipe for Vegan Challah for some time now. With three overripe banana's sitting on the counter, begging to be used in something sinfully wheaty, I spent this afternoon kneading and mixing and kneading and waiting and waiting and baking. Honestly, it's a lot of work--I guess not more than usual for bread, but I never bake bread--but totally worth it.

I took a couple hours break while it was rising to go grocery shopping at the Dekalb Farmer's Market and put the dough in the fridge to chill until I got back home, and I don't think that affected the bread. My braiding technique could use a bit of work, but the bread is just so tasty.

Oh, and in case you were wondering, it doesn't taste like bananas at all!

::edit:: I just noticed that I forgot to use 1 cup of soy flour. Huh. Oh well...I wonder what the difference is... oops!

Vegan Challah

2 1/2 Tbsp dry active yeast
1/3 cup warm water
6 cups flour (white:whole wheat ratio of 4:2)
1 cup soy flour
1 Tbsp salt
1/2 cup brown sugar or dry sweetner
1/2 cup vegetable oil (canola ok, too)
2 overripe (mostly black) bananas
1 cup boiling water
1/2 cup cold water
another half cup of boiling water for brushing braids
sesame seeds, poppy seeds, or sea salt to top

In one small bowl, dissolve yeast in the warm water, put to the side to stand for 5-10 minutes.

Mash bananas in other small bowl.

In large bowl mix: oil, sugar, salt, and boiling water, stirring so it's all mostly dissolved.

Add the cold water to the large bowl (the mix should be warmish now but not hot). Stir in yeast mix.

Add bananas.

Add flour, one cup at a time. (Don't forget the soy flour!)

Turn out onto lightly floured surface. Knead for 5-10 min, dough should be smooth, not too stiff or too runny.

Lightly coat the large mixing bowl in oil, turn the dough in it to just coat it with oil, place a towel over the dough in the bowl and let it rise for about 1 hr, till double in volume.

Punch dough down, turn out and knead again 2-3 min. Divide dough into 2 balls, divide each ball into 3 sections, roll each section into long ropes and make 2 braids. Preheat the oven to 350.

Let the braids rise 45 min. Boil a little more water. Just before putting braids in the oven, brush them with boiling water, then sprinkle with sesame seeds, poppy seeds, or sea salt.

Bake 30 min. You'll know they're done when you tap them on the bottom and they sound hollow. Let cool on a drying rack for 10 min before slicing. Enjoy!